Setup Outlook 2003 or Outlook 2007 to Work with Exchange 2007
Outlook Exchange Setup
Jump to Exchange 2007 Setup in Outlook 2003
Outlook 2007
First run any Windows Updates including optional ones
Follow instructions on http://support.microsoft.com/kb/939184/ to download hotfix and install it on
the Outlook 2007 computer. If you are running Outlook 2007 with Service Pack 1, you do not need this
update as it is included.
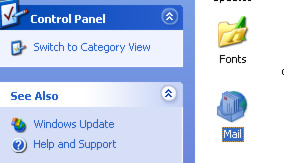
Click on Start, then control panel and open up the mail icon. If you don’t see it, make sure to switch to the classic view.
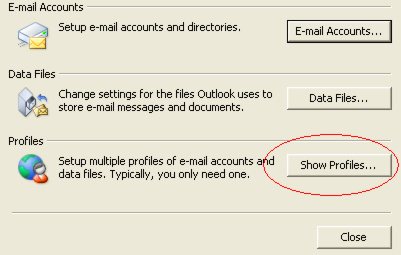
In the mail setup, Select the Profiles tab
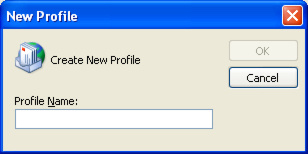
Select the Add button and type in a name of the profile you wish to make
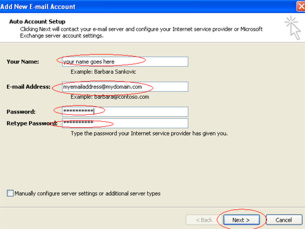
Type in your name, your email address and your password and click next
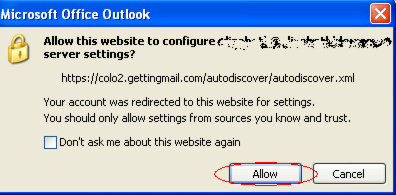
You will get a dialog box similar to below. Please click allow
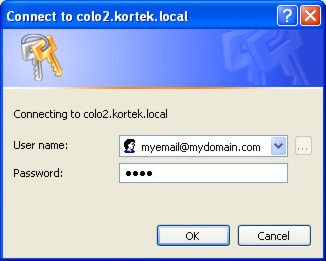
Wait a minute and you should get a prompt for your credentials. Your credentials will be your email address and your password. Then click OK.
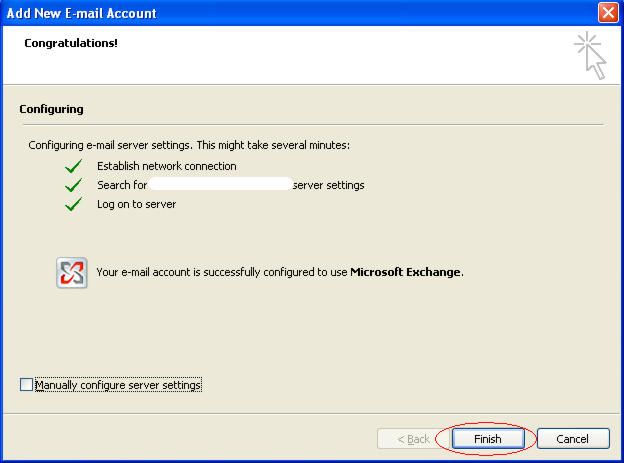
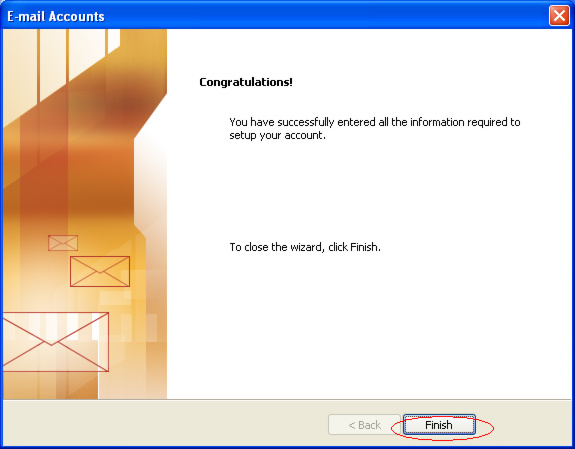
You will now get a congratulations screen. Go ahead and click on Finish
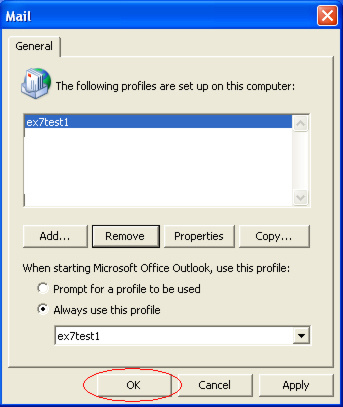
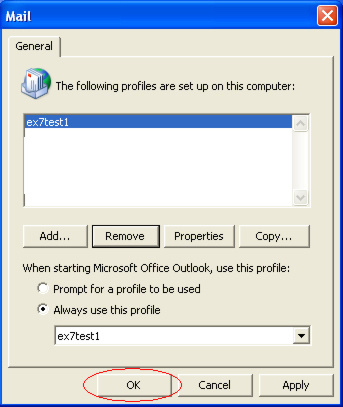
Now click on OK to close the mail setup and then continue to run your Outlook 2007
NOTE: If you would like to set the new profile you made to also be the active and default profile, be sure to also select the “Always use this profile” selection and select your profile.
First run any Windows Updates including optional ones
Click on Start, then control panel and open up the mail icon. If you don’t see it, make sure to switch to the classic view.
In the mail setup, Select the Profiles tab
Select the Add button and type in a name of the profile you wish to make
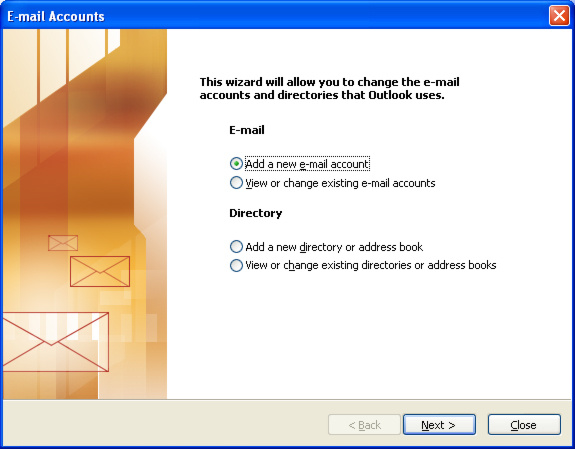
Select the radio box “Add a new e‐mail account” and click on next
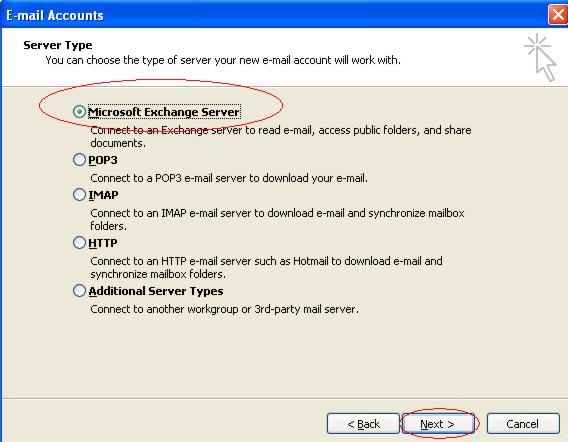
On the radio button select Microsoft Exchange Server and then click next
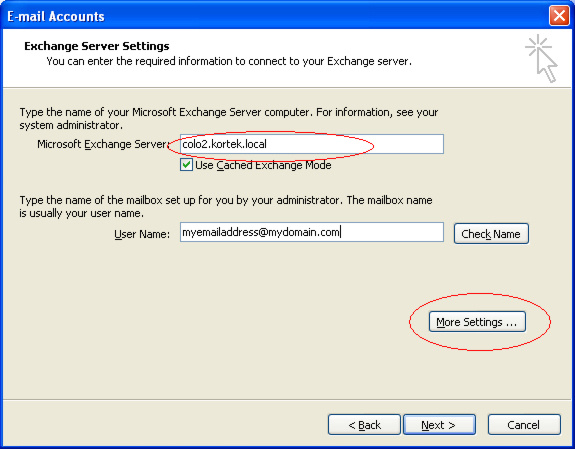
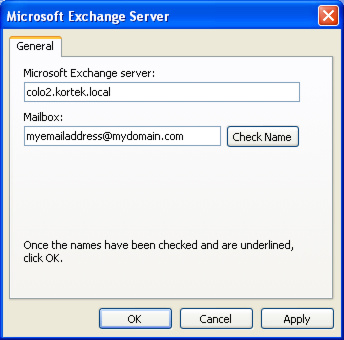
In the Microsoft Exchange Server box type in colo2.kortek.local, in the user name box type in your email address and then hit the more settings box
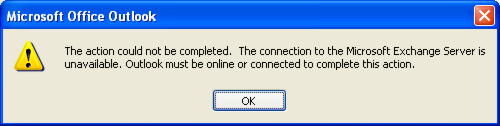
You will now get a error box similar to the one below. Hit OK
You will now get a screen similar to below, go ahead and hit OK
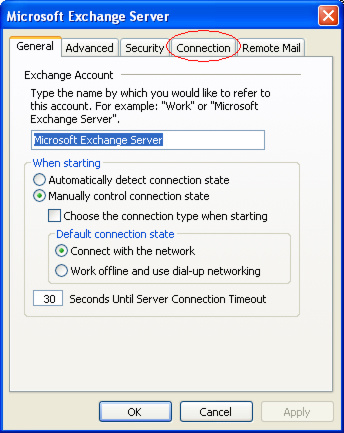
You will now see a screen similar to the one below. Click on the Connection TAB
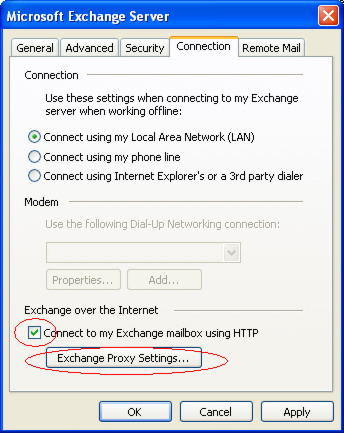
On the connection tab, you will see a section that says Exchange over the Internet. Check the box below that says “Connect to my Exchange mailbox using HTTP” and then the Exchange Proxy Settings…
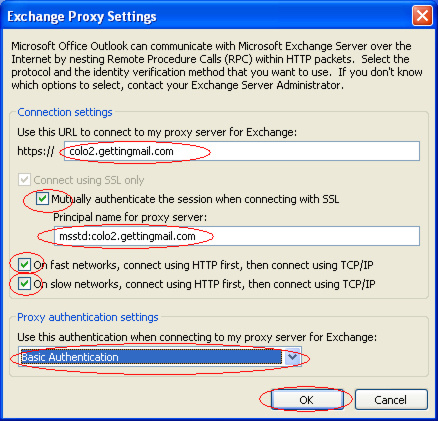
On the Exchange Proxy settings box, under the Connection settings area, in the https:// field, type in colo2.gettingmail.com.
Check the box titled “Mutually authenticate the session when connecting with SSL”. In the “Principal name for proxy server:” box, type in msstd:colo2.gettingmail.com.
Ensure that both boxes below titled “On fast networks, connect with HTTP first, then connect using TCP/IP” and “On slow networks, connect with HTTP first, then connect using TCP/IP” are checked.
Under the “Use thisauthentication when connecting to my proxy server for Exchange” select Basic Authentication. Now click on OK.
Hit OK again on the previous screen and then hit the next button. Now click on the Finish button
Now click on OK to close the mail setup and then continue to run your Outlook 2003.
NOTE: If you would like to set the new profile you made to also be the active and default profile, be sure to also select the “Always use this profile” selection and select your profile.